DIY Dog Coat
One of the most fun parts of owning a small-ish dog is the clothes! I have a mini schnauzer/shih tzu mix whose hair grows to outrageous lengths. When he gets his hair cut in the autumn and winter, he gets really chilly so he likes to sport a sweater. I say "he likes" because he seriously likes it. He'll shiver otherwise so when we grab a sweater from his toybox, he'll come over, eager to put it on.
Turns out, dog clothes can be kind of pricey. I mean, I hesitate to spend $20 on a sweater for myself so I have a hard time justifying spending that much on a sweater for George Michael. Simple solution: make some clothes myself!
 Just an FYI: this is a relatively simple DIY and it involves just a little hand sewing. If you have a sewing machine, this should take you one hour, tops. If you don't have a sewing machine, it should take you three hours, tops. Caveat: you must have some basic sewing skills and an understanding of the way garments are sewn in general. But yes, it's that easy. The secret is in the fleece!

You'll need:
fleece fabric (amount will depend on the size of your dog and how many coats you want to make)
faux sherpa fabric (small piece)
trim (again, amount will depend on the size of your dog and how many coats you want to make)
scissors
needle & thread (or sewing machine)
pins
fabric glue
velcro strips
 First things first, you'll want to measure your dog. Looser measurements are fine, because this coat is somewhat adjustable. I mean, hello, there is velcro in the list of materials. So, grab a cloth measuring tape and jot down the following: neck, back, waist, and front. For the front, I measured from the collar to two or three inches shy of GM's peepee. For his back, I just measured from where his collar rested on his neck down to about where his hind leg started.
 With your measurements in hand, you'll want to draw the following pattern. It's a rough sketch and I wish I had some printables for you, but because dogs come in all different shapes and sizes, it's best if you just measure your dog and sketch the patterns yourself.
 I used some flimsy paper to make my patterns. I always save the newsprint paper that stores use to wrap up breakables and that's what I used. I folded each piece in half, drew half of the pattern, cut it out, unfolded it, and tada!
 Then, I just pinned my patterns to the fleece, and cut them out. Because fleece doesn't fray, it doesn't need to be hemmed. And because this project doesn't entail much sewing, you don't need to incorporate any seam allowances. Just cut the fleece out exactly the same size as the pattern and cut it well! Jagged edges are a no no!
As you can see, I picked out a plaid-patterned fleece because I wanted the coat to look like classic flannel shirts that you might see on, let's say, a lumberjack.


 Cut the collar out of the sherpa. Twice. You need two pieces, unless you have some cool double-sided sherpa. Mine was sheepy on the front but rough on the back.
 To sew the coat, lay the front and back pieces of the fleece on top of each other, with the nicer side of the fleece facing inwards (if there even is a nicer side). Then, sew the two shoulder pieces together.
 Once the shoulders are attached, squirt a little glue around the edges of the fabric and press on the trim. Then, secure it with some needle and thread. The glue isn't 100% necessary but it helped tremendously when it came to sewing around the curves and corners.
 Last step is to sew the collar. Lay the two pieces of sherpa on top of each other, with the furry side facing inwards. Sew around the sides and top edge, leaving the longer edge untouched. Then, flip the collar inside out so that the furry sides are now facing outwards.
 Sew the collar onto the coat. The collar will go around the neck. Turn the coat inside out, tuck the collar inside the neck, and then sew. This way, when you turn the coat right side out, the stitching won't show.
I made a booboo and ended up with a collar that was slightly askew, but it's hardly noticeable when GM is wearing it, so I didn't feel the need to fix it.
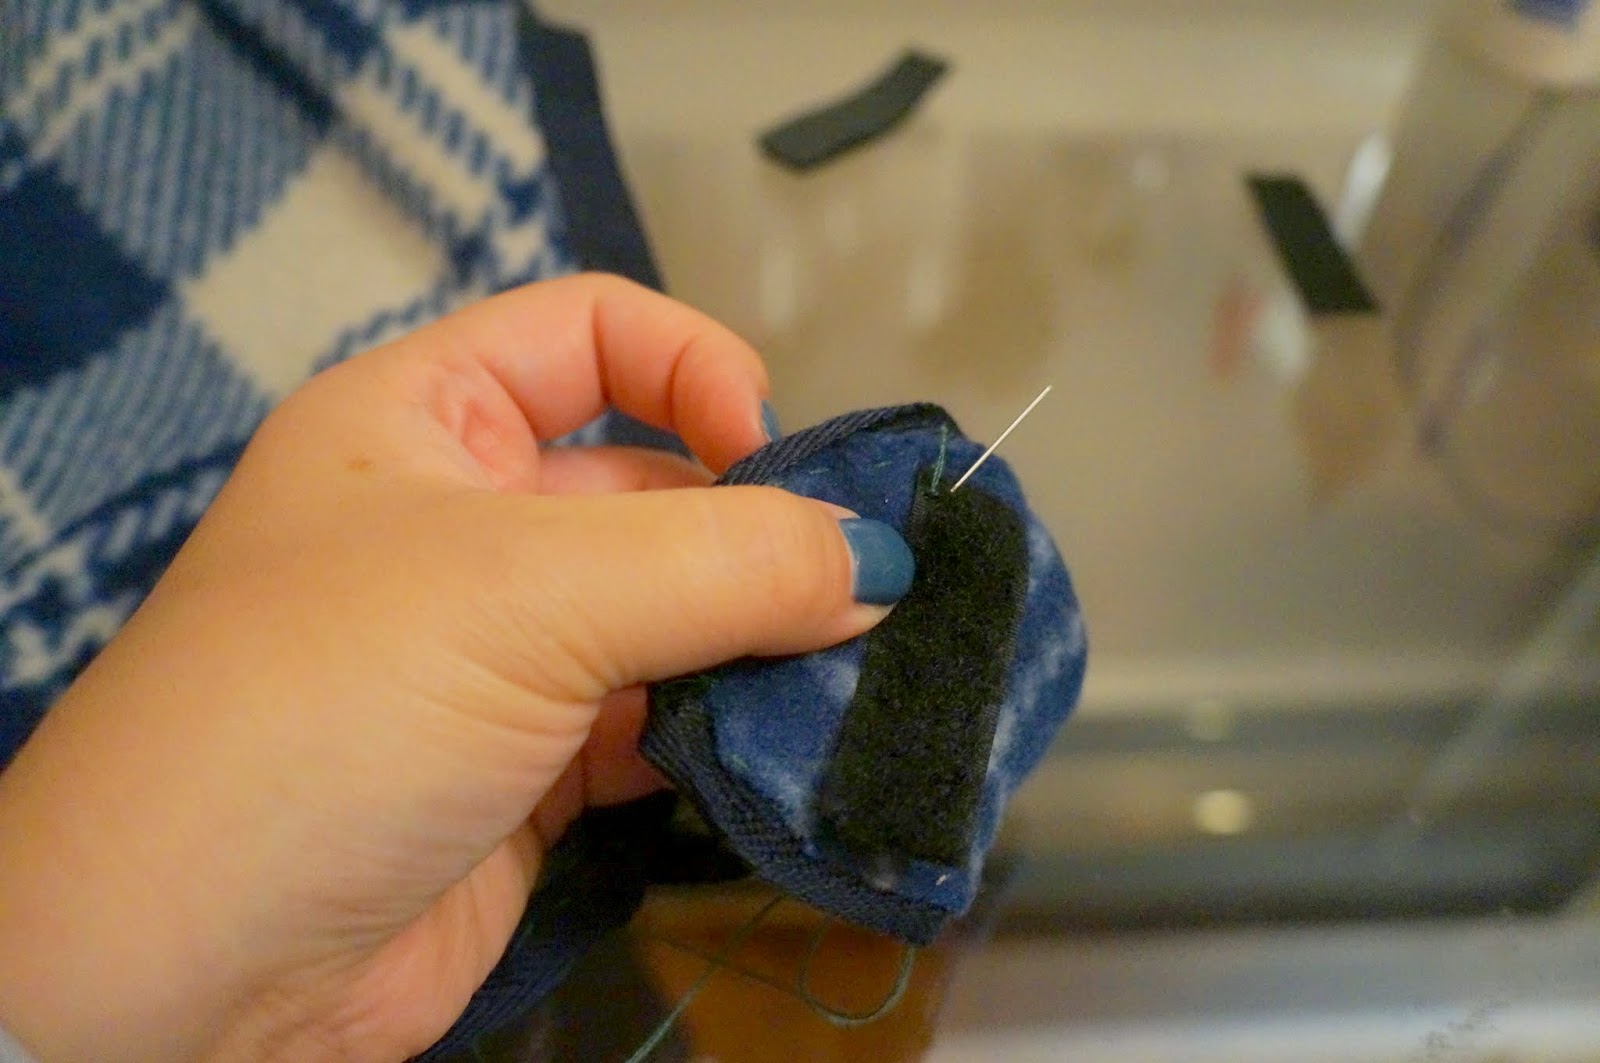
 Lastly, you just want to sew on the velcro. One piece on each strap and two corresponding pieces on the back. I decided to sew one velcro piece vertical and the other horizontal just so it would be easier to slap the coat on GM instead of making him wait while I tried to match up two parallel pieces of velcro.

 And tada! Here's the finished coat, back and front. I'm sure the directions I gave above might have been slightly difficult to follow but hopefully seeing the finished product helps.

 Here's a nude dog, ready for his outfit!
 And here is a clothed dog! To put on the coat, just slip it over your pup's head, and then pull the straps around his/her belly and secure the velcro.
 I had the hardest time making GM sit still for these photos. He really doesn't like getting his photograph taken; I can't explain it. You whip out a camera or a phone and he's like, "Okay, stop." Anyway, I tried holding up a cookie but it made him bark.
 I mean, I managed to get a decent shot here and there, but let's face it; these aren't great. Also, in the photo below, GM totally has "lipstick" which is gross but also kind of hilarious.

 So, do you love your dog enough to take on this DIY? Kidding! It's really simple. And you know, you don't even have to add any trim, which is one of the more grueling parts. What do you think? I think you should go for it!
 xoxo.
xoxo.
Turns out, dog clothes can be kind of pricey. I mean, I hesitate to spend $20 on a sweater for myself so I have a hard time justifying spending that much on a sweater for George Michael. Simple solution: make some clothes myself!

You'll need:
fleece fabric (amount will depend on the size of your dog and how many coats you want to make)
faux sherpa fabric (small piece)
trim (again, amount will depend on the size of your dog and how many coats you want to make)
scissors
needle & thread (or sewing machine)
pins
fabric glue
velcro strips
As you can see, I picked out a plaid-patterned fleece because I wanted the coat to look like classic flannel shirts that you might see on, let's say, a lumberjack.

I made a booboo and ended up with a collar that was slightly askew, but it's hardly noticeable when GM is wearing it, so I didn't feel the need to fix it.


Great coat. I'll be making one for our foster dog, Winston. GM looks a LOT like Winston and I'm wondering about his breed or breed mix. I think Winston is a Tzoodle/Shih poo.
ReplyDeleteWinston sounds adorable and I love his name!
ReplyDeleteI love it! just what I was looking for for my miniature Zu Chon and toy Maltese! I'm going to make two of these!
ReplyDeleteCute!!! Will they match?
Delete